Black out certain days in from the Jquery Calendar Picker

The JQuery Calendar picker is a very handy element that is used in many places on the web. The default functionality is great, but what if you need a custom date range, or to black out specific dates?  The picker has an event handler called “beforeShowDay” that will let you hook into and modify what dates are available to pick from the element.

For example, to allow users to sign up for campus visits on Tuesday and Thursday, I needed to  “black out” the rest of the days from the ui. I also needed to black out a couple of days that will be unavailable due to special events. I can write a function to specify these days, then call the function on the “beforeShowDay” event handler.

[code]

var unavailableDates = [“19-5-2016”, “16-6-2016”];
function unavailable(date) {
dmy = date.getDate() + “-” + (date.getMonth()+1) + “-” +date.getFullYear();
if ($.inArray(dmy, unavailableDates) < 0) {
return [true,””,””];
} else {
return [false,””,”This day is unavailable.”];

}
var day = date.getDay();
return [(day == 2 || day==4)];
}
$( “#mydatefield” ).datepicker({
minDate: ‘+7d’, changeMonth: true,   changeYear: true, yearRange:”c-80:c”,  beforeShowDay: unavailable});

[/code]

Make a calendar date picker using jquery

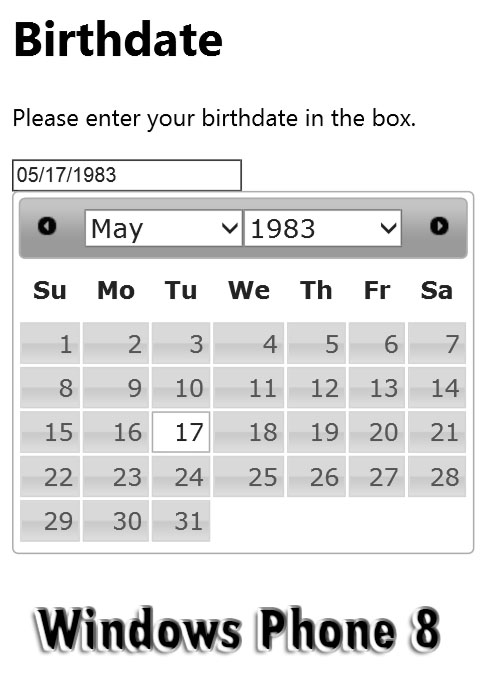
Due to the strict Web Content Accessibility Guidelines for institutions that serve public internet content to users around the world, I am updating some legacy apps to use a date picker to allow user to enter their birthdate. After some research I’ve decided that the jQuery UI datepicker would be the perfect thing to use due to its ability to work in almost every browser that exists.

The first thing I will do is to  read the docs at jQuery official site. Now that I have a good understanding of the scripts and code involved, lets break down the minimum requirements to have this working in a page.

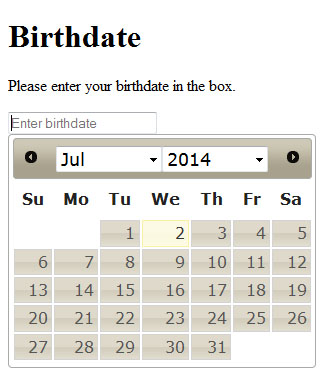
I would want the user to click into the text field…


…and have the picker pop up, with drop downs to choose the month and year…

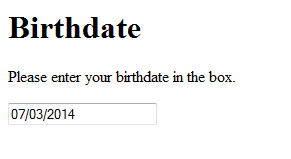
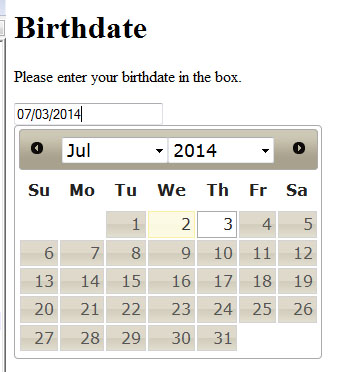
…then they click to chose the day.

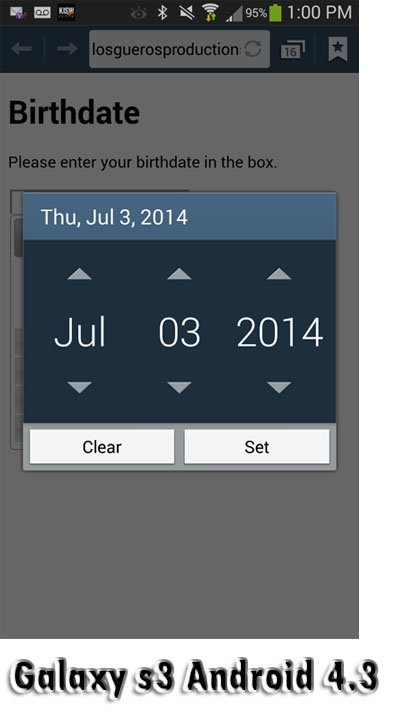
The audience for this user case scenario are adults of an age to be interested in information about college. The device target includes desktop and laptop computers. Mobile devices have native form controls that would conflict with this script.

We start with my html 5 template, then add the calls to the google cdn to get the jquery plug in scripts.
[code language=”html”]<script src=”http://ajax.googleapis.com/ajax/libs/jquery/1.11.1/jquery.min.js”></script>
<link rel=”stylesheet” href=”http://ajax.googleapis.com/ajax/libs/jqueryui/1.10.4/themes/smoothness/jquery-ui.css” />
<script src=”http://ajax.googleapis.com/ajax/libs/jqueryui/1.10.4/jquery-ui.min.js”></script>[/code]
Next we have  a form  with a date element, given proper name and id attributes.

<form><input type="date" id="mydatefield" name="datefield" value="" placeholder="Enter birthdate" /></form>

Now, all I have to do is call the jquery date picker function on the form element, with options changeMonth and changeYear setup as so…

 $( "#mydatefield" ).datepicker({ changeMonth: true,   changeYear: true, yearRange:"c-80:c"  });

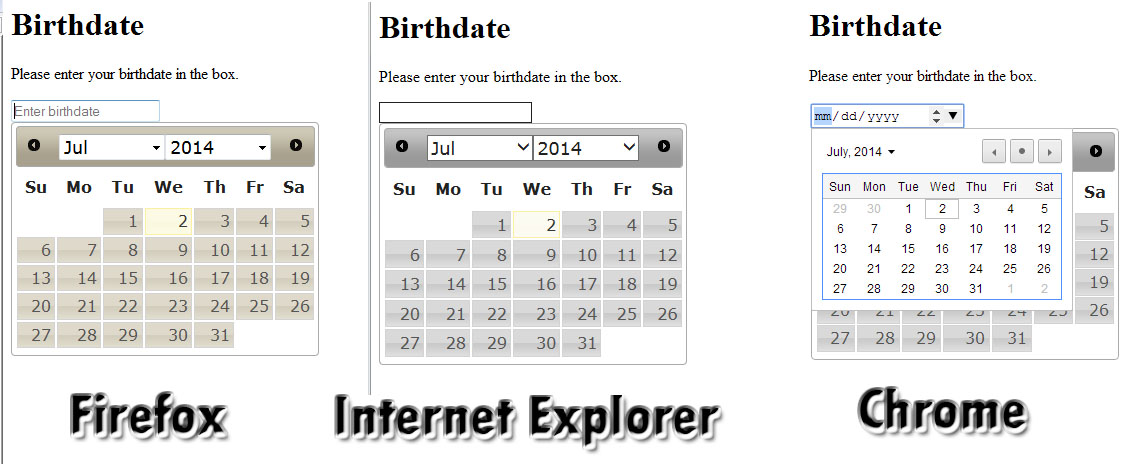
That’s all there is to it. While testing on the desktop, it is working well in Chrome,  Firefox and Internet Explorer.

To avoid the problems of overlayed natives on mobile devices , We  just use a “text” input instead of the html5 “date” input element. We can easily use CSS media queries JavaScript to change the data type on the fly.

detect object in dom jquery see if a table exists on html5 page by id

have a table that is created dynamiclly. need to see if its there, create it or append to it based on its existence.


Lets set a var usertableexists=false;

if($(“#mytableid”).length){usertableexists=true;}

console.log(“the table exist var is “+ usertableexists)

Using jquery document delegate to create Inline Editable fields.

I have come up with a technique to allow the user to edit content “Inline”.

Lets look at an example. I have a table of data, and the user needs to be able to edit the “Description” Field. Rather than take the user away from this ui view, I wish to enable “Inline Editing” like many powerful applications are offering these days.

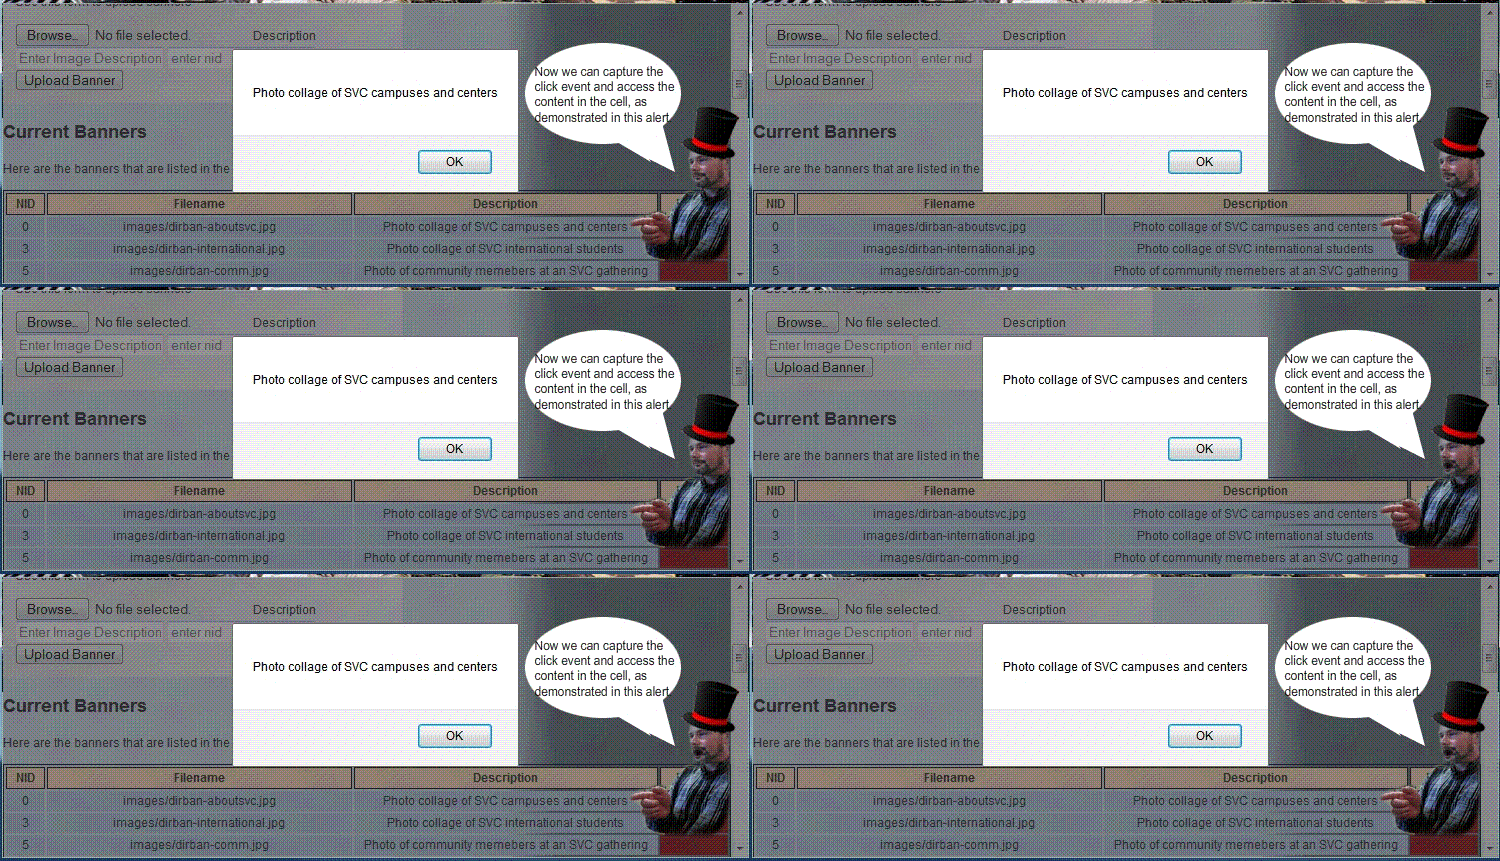
The first step is to assign functions to the correct fields and capture the users input events. The user would click on the field to select it, so lets set up a doc delegate event to capture a click on the description field. We need to use doc delegate because the data is dynamic and so isn’t  in the DOM when the events handlers are normally assigned. Read my post about JQuery Document Delegate to catch up on this technique. I am going to delegate the capture of a click event on any table row <tr> with a class of “editBannerDescription”

$("#bannerslist").on("click", ".editBannerDescription", function(e){
var thedata=$(this).html();
alert(thedata);
 });

Yeah boyeee we have captured a click event for any element in the bannerslist table, and have access to the content that is in the table cell.

The next step is to alter the ui view so the user can edit the contents of the description table cell. I use a JQuery / JavaScript function to accomplish this:

enableEditDescription(object, bannernid){
     console.log("Message from enable Edit Description function: lets 
enable to edit the description of slide id:"+bannernid+" from
description of : "+$("#"+object).html()); }

I will continue to modify the enableEditDescription function to alter the ui view when the user clicks. I will grab the content from the cell, and replace the content with a text area whose value is the text that was in the cell.

The final code looks like this:

$("#bannerslist").on("click", ".editBannerDescription" , function(e){
var thedata=$(this).html();
var object=$(this).attr("id");
var getbannernid = object.match(/d+$/);
if(getbannernid){
    bannernid=parseInt(getbannernid[0], 10);
    console.log("Message from banner admin inc, here in doc delegate for 
     editBannerDescription with content of :"+thedata+" in cell 
     object id: "+object+" for banner nid: "+bannernid);
     enableEditDescription(object, bannernid);}
else{ alert('error getting id');}
 }); // end #bannerslist doc delegate actions

Now, when the user clicks a table cell with editable content, the cell changes into an inline editor.

The user needs to be able to “escape out” of the edit mode, discarding any changes that were made in the field.

Lets start with capturing the escape key press event when the user is in an editing field. We’ll use the good ol doc  delegate to capture this as so…

$("body").on("keydown", "textarea, input", function(e){
if(e.keyCode==27){
console.log("We have key press of escape key, on event target " + e.target.id + 
" lets exit edit mode without saving changes. Lets decide what place they're editing...");}
}); // end on keydown event handler

Now I can put back the original content of the cell and the user will have “escaped out” of edit mode.

The next step is going to be really fun. We are going to capture the press of the “Edit” button and save the new content into our cms.

Sort a table using JavaScript and Jquery

I have come across the need to update a ui view of tabular content to be sorted by numeric order ascending. Javascript has a sort() that can be used for this purpose. I will use jquery for its powerful and easy selection capabilities.

Here is a sample of the tablular data:

Sequence Filename Description Enabled Delete
0 sliders/test.jpg Its a slider True X
1 sliders/test2.jpg Its another slider! True X
2 my file location my file description True X

When the user changes the sequence, I would like to update the ui view to reflect the changes in the display order.

I have given each row of the table that contains sortable data a class of “sort”

Then I use Jquery to select those rows, and sort them by the number in the sequence column.

 function sortthetable(whattable){ var $tbody = $('#'+whattable); $tbody.find('tr.sort').sort(function(a,b){ var tda = $(a).find('td:eq(0)').text(); // can replace 0 with the column you want to sort on var tdb = $(b).find('td:eq(0)').text(); // this will sort on the firstcolumn // if a < b return 1 return tda > tdb ? 1 // else if a > b return -1 : tda < tdb ? -1 // else they are equal - return 0 : 0; }).appendTo($tbody); } 

Working with money in JavaScript

Here are some great techinques that I have come up with while working as paperless applications developer at SVC:

Working with money can require a lot of scripts to ensure sucessful data entry , transfer and saving.

One thing that comes up is the errors that users can make when entering the figures for money into a form. The forms will have many different requirements for entering the monetary information, such as type of figures desired. For example, on one form, I need the user to only enter a whole dollar amount, and I need to make sure that no dollar signs, cent signs or punctuation make it into the calculations for totals.

Here is a script to clean an entry of all dollar signs, cent signs,  punctuation  and ensure that whole dollar amounts are entered. For this usage, I have set up the function to be passed a Jquery object of a textfield , and the function will get the value, fix it and put it back in.
[code language=”javascript”]
// strip out any $$ .00 and anything else
function stripper(who){
dirtynumber = $( who ).val();
cleannumber = parseInt(dirtynumber.replace(/[^d.]/g, “”));
if(isNaN(cleannumber)){cleannumber=0;}
$( who ).val(cleannumber); }
[/code]

Here is a script to compare two values to make sure they are the same:

[code language=”html”]
// ensure budget items total match budget request
var amount1 =  parseInt($(“#fund_request”).val().replace(/[^d.]/g, “”));
var amount2 =  parseInt($(“#justification_budget_total”).val().replace(/[^d.]/g, “”));
if(isNaN(amount1)){amount1=0}
if(isNaN(amount2)){amount2=0}
if(amount1 !== amount2){alert(“The total budget request : ” + amount1 + ” doesn’t equal the budget justification item total: ” + amount2 + “. Please check your numbers and re submit.”);return false;}
[/code]

Technical Instructions: How to use my Form Content Display Wizard

So, to use my plugin to any form or content,

Separate content chunks:
Wrap the content in div containers with unique ids begining with “step_xxx”  where xxx should be a detailed way to identify the content such as “step_intro” and  “step_personal_info”

If the path is non branching, the plugin will create buttons for “back” and “next” named “stepDownButton” and “stepUpButton” . It will look for the second to last step and put a submit, and the last step is the confirmation. To create a custom path, branch, or skip a step, just create a button named “stepDownButton” and “stepUpButton” . Give the button an onclick of stepUp(‘stepname’) or stepDown(‘stepname’) to make the button skip to a certain step.

Table of contents
The plugin will use the first element inside the step as description for the table of contents. You can use the attribute stepdesc on the step_xxx element as a custom title for the toc. The toc will be appended to the first step unless you make a custom toc using a container with id of “tableofcontents”. This can be disabled by …..

Form elements and Validation
To provide “empty field” validation to form elements in a step, just add the class “required” to the element. Place the class “email” to validate an email address on one input element. You can add class “match” to two elements in a step and they will have to match each other. Give the elements a unique ID and a good name attribute, and the plugin will create placeholders for the text input elements from the name.
NOTE: it seems like the name attribute is the perfect place to put a readable descriptive title that could be used in creating the labels, and for  summary display. NOTE: it seems like moving to the new html5 text inputs for validation such as email tel, then if input type = email, wouldn’t need a class selector.Just a thought for moving forward with

Data summary
In the second to last step, the plugin will set the the “NEXT” button onclick to stepUp(‘submit’);  The plugin will add a summary of the data the user entered so they may go back and make any changes. You may choose a custom display of the summary by putting an element with id “formsummaryarea” into this step. The plugin will omit any empty or hidden fields from the summary, and you can put class “nosummary” to omit any other items from the summary.

Submit and final confirm
In the final step, you should place your  final confirmation text there. This will tell the user the results of their data submit, success or error.  When user is ready, the script will submit the form data, and move to the final confirmation.


Themeing the elements

To theme the elements, just add classes to items in the ui view using jquery :

This will add a Panel effect to the divs—
$(‘div[id^=”step_”]’).addClass(“softblackgradient blackbottomrightboxshadow mediumallaroundpadding”);

The buttons wont work to style this way cause they aren’t in dom yet. To theme the buttons, you need to  set these global variables before you call to include the plugin.:

I feel that the “Begin”  button should look very different from the Next and Back buttons:
beginbuttonclass = “button roundedcorners success mediumallaroundpadding”

Here is to style the step up and step down buttons:
stepupbuttonclass=”button oval success smallallaroundpadding”
stepdownbuttonclass=”button oval alert smallallaroundpadding”

The “Submit” button needs to also look very different from the step up and down buttons.
style it like this: submitbuttonclass=”button roundedcorners mediumallaroundpadding success”


If you have put in custom buttons to go to non linear paths, make sure to still give the the names of stepUpButton and stepDownButton. Then you can select and style them as well using the jquery selector.

Theres tableofcontents to layout the toc, and  highlightstep to control the highlighted step. This is proving very difficult to get out of the plugin, since the toc relies on the scripts. There are classes yellowhighlight, and  mediumtext that will need to be declared in the ui view that is using the plugin.

Add a Zero (0) in front of numbers below ten (10)

In certain situation I need to add a zero in front of numbers below ten. It could be used for money, .05 and for time :05 and I’m sure there are other situations where this could be useful.

// add zer0 in front of minutes below ten 10
function pad(n) {if (n < 10) return “0” + n; return n;}

// use the pad function
for(var minute=0; minute<50;minute=minute+5){
$(“#minutes”).append(“<option value='”+pad(minute)+”‘>”+pad(minute)+”</option>”);
}

Creating dynamic selects using Javascript and JQuery

I need to have a select form element, with the options generated from dynamic content that could come from a database or an array, with an unknown number of options. Then, I need to create two more selects, with all of the options except the ones selected in the previous select. For example, a user must choose their first, second, and third choices for college.

Lets say we have a list of colleges and their abbreviations:

<input type=”checkbox” name=”scholarshipschools” value=”CWU” title=”Please select a college.” /> Central Washington Univ, Ellensburg <br />
<input type=”checkbox” name=”scholarshipschools” value=”EWU” /> Eastern Washington Univ, Cheney <br />
<input type=”checkbox” name=”scholarshipschools” value=”SVC”  /> Skagit Valley College <br />
<input type=”checkbox” name=”scholarshipschools” value=”ESC” /> The Evergreen State College, Olympia    <br />
<input type=”checkbox” name=”scholarshipschools” value=”UWB” /> Univ of Washington, Bothell <br />
<input type=”checkbox” name=”scholarshipschools” value=”UWS” /> Univ of Washington, Seattle <br />
<input type=”checkbox” name=”scholarshipschools” value=”UWT” /> Univ of Washington, Tacoma <br />
<input type=”checkbox” name=”scholarshipschools” value=”WSU” /> Washington State Univ, Pullman <br />
<input type=”checkbox” name=”scholarshipschools” value=”WWU” /> Western Washington Univ, Bellingham


The checkboxes don’t allow the user to choose what ones would be their first, second and third choices. Also, doesn’t let the user know that they are limited to choosing three. I have been asked to redesign this form so that the user has a better interaction with the page.

I don’t want to type the names of the schools and their abbreviations more than once while I develop this, so the first thing I want to try is to put them into an array, then I can use them when, where and in whatever container I wish. (like changing from checkboxes to selects).


var thecollegeabbr = [“CWU”,”EWU”, “SVC”, “ESC”, “UWB”, “UWS”, “UWT”, “WSU”, “WWU”];

var thecolleges = [“Central Washington Univ, Ellensburg”, “Eastern Washington Univ, Cheney”, “Skagit Valley College”, “The Evergreen State College, Olympia”, “Univ of Washington, Bothell”, “Univ of Washington, Seattle”, “Univ of Washington, Tacoma”, “Washington State Univ, Pullman”, “Western Washington Univ, Bellingham”];

I would like for the college name to have its abbreviation attached to it, rather than have them in two separate arrays. Using the information from my previous post on JavaScript Array Best Practices, I see that I could streamline this a little, and make a more efficient 2-dimensional array. I will use a for-if loop to push the abbreviation and title into a two dimensional array.

var thecollegechoices=[];
// combine the abbreviation and the title into a two dimensional array…
for(i=0;i<thecollegeabbr.length;i++){thecollegechoices.push([thecollegeabbr[i], thecolleges[i]]); }

Now that I have an array of data to populate the selects, I will create an algorithm to  put the data into the “First Choice” selector:
// now put the data into a select element
for(i=0;i<thecollegechoices.length;i++){
$(“#firstcollegechoice”).append(“<option value='”+ thecollegechoices[i][0] +”‘>”+ thecollegechoices[i][1] +”</option>”);
} // end for loop to put the data into a select element

screen shot of dynamic selectThe results are very effective, as I now have a select that was dynamically populated using the array of data that I was provided. The next step is where this really starts to get fun. Now I need to create a “Second Choice” selector using all of the choices from the first one, except for the one that was chosen by the user in the “First Choice” selector. This will need an algorithm that is a bit more complex, and will be triggered by the event of the user choosing the first choice.

From my previous article about using JQuery to handle events, I know that I can access the onchange event handler and give it a method that will run my function when the user changes the value of the select. I will build the algorithm into this method as so:

  • Get the value of the college that the user has chosen.
  • Rebuild my array of “thecollegechoices”, eliminating the option that was previously chosen.
  • Populate the options of the “Second Choice” selector using the new data that has been  put into thecollegechoices array.

Here is a snippet of what this looks like now…

$( ‘#firstcollegechoice’ ).on(“change”, function(){
var thecollegechoices=[];
for(i=0;i<thecollegeabbr.length;i++){
// check here to see if the choice is used in the first select.
if(thecollegeabbr[i]!=$(“#firstcollegechoice :selected”).val())                                {thecollegechoices.push([thecollegeabbr[i], thecolleges[i]]);}
}

for(i=0;i<thecollegechoices.length;i++){$(“#secondcollegechoice”).append(“<option value='”+ thecollegechoices[i][0] +”‘>”+ thecollegechoices[i][1] +”</option>”);}

}); // end first choice change functions


Dang, this is lookin good. I now have a second choice selector with all the options except for the one that was chosen by the user in the first selector.

It seems like an easy path to our goal, a “Third Choice” selector with all of the options except what was chosen in one and two. Then we are left with some ui clean up to ensure a good user experience. I like to use responsive disclosure to guide the user through a form whenever possible. For this instance, I will disable the second and third choice drop-downs until they are needed, so the user will easily see what they need to do.

———————————– here is the dev code ———————————–

<select name=”scholarshipschools” id=”firstcollegechoice” ><option value=””>First Choice</option></select>
<select name=”scholarshipschools” id=”secondcollegechoice” disabled=”disabled”><option value=””>Second Choice</option></select>
<select name=”scholarshipschools” id=”thirdcollegechoice” disabled=”disabled”><option value=””>Third Choice</option></select>

<script>
// make an array to hold the college choices.
var thecollegeabbr = [“CWU”,”EWU”, “SVC”, “ESC”, “UWB”, “UWS”, “UWT”, “WSU”, “WWU”];
var thecolleges = [“Central Washington Univ, Ellensburg”, “Eastern Washington Univ, Cheney”, “Skagit Valley College”, “The Evergreen State College, Olympia”, “Univ of Washington, Bothell”, “Univ of Washington, Seattle”, “Univ of Washington, Tacoma”, “Washington State Univ, Pullman”, “Western Washington Univ, Bellingham”];
var thecollegechoices=[];

// combine the abbreviation and the title into a two dimensional array…
for(i=0;i<thecollegeabbr.length;i++){thecollegechoices.push([thecollegeabbr[i], thecolleges[i]]); }

// now put the data into a select element
for(i=0;i<thecollegechoices.length;i++){$(“#firstcollegechoice”).append(“<option value='”+ thecollegechoices[i][0] +”‘>”+ thecollegechoices[i][1] +”</option>”);}

$( ‘#firstcollegechoice’ ).on(“change”, function(){
//$(“#debugzone”).html($(this).val() + ” chosen now build the second select<br />”);
$(“#secondcollegechoice”).html(“<option value=”>Second Choice</option>”).removeAttr(“disabled”);$(“#thirdcollegechoice”).html(“<option value=”>Third Choice</option>”).attr(“disabled”, “disabled”);
var thecollegechoices=[];
for(i=0;i<thecollegeabbr.length;i++){
// check here to see if the choice is used in the first select.
if(thecollegeabbr[i]!=$(“#firstcollegechoice :selected”).val()){thecollegechoices.push([thecollegeabbr[i], thecolleges[i]]);}
}

for(i=0;i<thecollegechoices.length;i++){$(“#secondcollegechoice”).append(“<option value='”+ thecollegechoices[i][0] +”‘>”+ thecollegechoices[i][1] +”</option>”);}

});

$( ‘#secondcollegechoice’ ).on(“change”, function(){
//$(“#debugzone”).html($(this).val() + ” chosen now build the third select<br />”);
$(“#thirdcollegechoice”).html(“<option value=”>Third Choice</option>”).removeAttr(“disabled”);
var thecollegechoices=[];
for(i=0;i<thecollegeabbr.length;i++){
// check here to see if the choice is used in the first select.
if(thecollegeabbr[i]!=$(“#firstcollegechoice :selected”).val() && thecollegeabbr[i]!=$(“#secondcollegechoice :selected”).val()){
thecollegechoices.push([thecollegeabbr[i], thecolleges[i]]);
}
}

for(i=0;i<thecollegechoices.length;i++){$(“#thirdcollegechoice”).append(“<option value='”+ thecollegechoices[i][0] +”‘>”+ thecollegechoices[i][1] +”</option>”);}

});

</script>
<!– end new content dev area –>